Created by Historic Deerfield Education Program Coordinator Claire Carlson
Welcome to the 19th installment of Maker Mondays. We will send you a Maker Mondays activity on the fourth Monday of the month. Check your social media feed or look for an email from us on Monday,December 28th for the next fun activity that you can do at home, inspired by history and the Historic Deerfield collections, using common household items.
As the days get shorter and the sun sets early in the Northern hemisphere, we look to the past for inspiration for lighting our homes and lives. Historic Deerfield’s collection of eighteenth and nineteenth-century lighting equipment includes fat lamps, candlesticks, sconces, oil lamps and lanterns. Let’s take a look at a few examples from our collection, then we will focus on a punched or pierced tin lantern that you can make at home from a soup can.
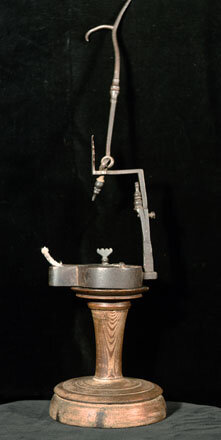
We wanted to share this example of a fat lamp with you to start. This is a wrought iron fat lamp (also known as a crusie or betty lamp) with an adjustable hook for hanging and an iron shield at the top. The basic shape of the fat lamp changed little from pre-Roman civilizations until the 19th century; generally they are hanging grease-burning lamps with one or two pans (the second, lower pan could catch drippings), and little or no wick support. The lamp was filled with animal fat or oil and a fabric wick lit to illuminate a small area within the house; unfortunately, fat lamps are better known for their smoke than light since they could be extremely sooty and smelly depending on the fat source – beef fat or tallow was preferred. Although some were made by American blacksmiths, many were imported from Birmingham, England by American merchants.
Many people turned to making and burning candles as a way to bring light into the home after sunset. Lighting devices were intended to provide light for indoor tasks like reading, writing, or sewing, and for illuminating outdoor chores out in the barn before dawn or after dusk.
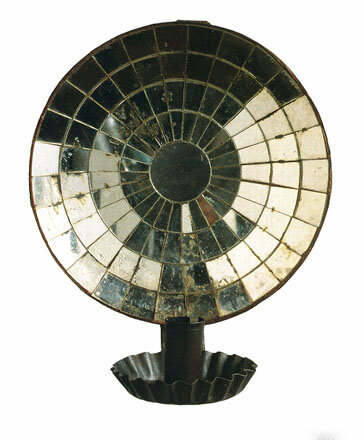
A wall sconce like this one from the Nadeau Collection at Historic Deerfield has a circular concave backplate that is covered on the front with a mosaic of silvered glass. A metal ring (like a footring) attached to the back serves as a spacer and a platform to hold the sconce evenly on the wall. The scone has a candle socket and drip pan with a crimped edge. This sconce dates to the early 1800s. The mirrored backing would reflect the light from the candle into the room, providing both light and beauty.
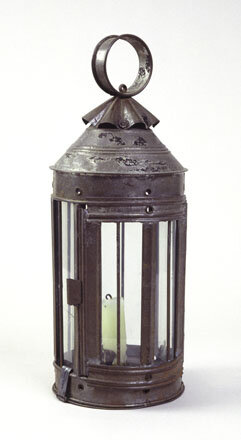
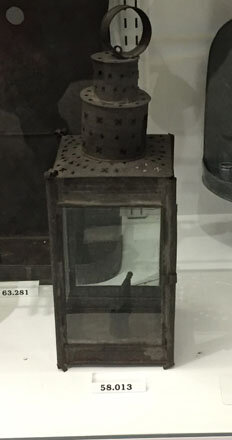
Lighting devices made from tin-covered sheet iron were known as tin lanterns, punched tin or pierced tin lanterns, and barn lanterns. This circular tin lantern in our collection is covered with traces of old black paint, has a ring handle, a fluted dome over the conical top, glass sides, one latched door, and a flat base with one candle socket.
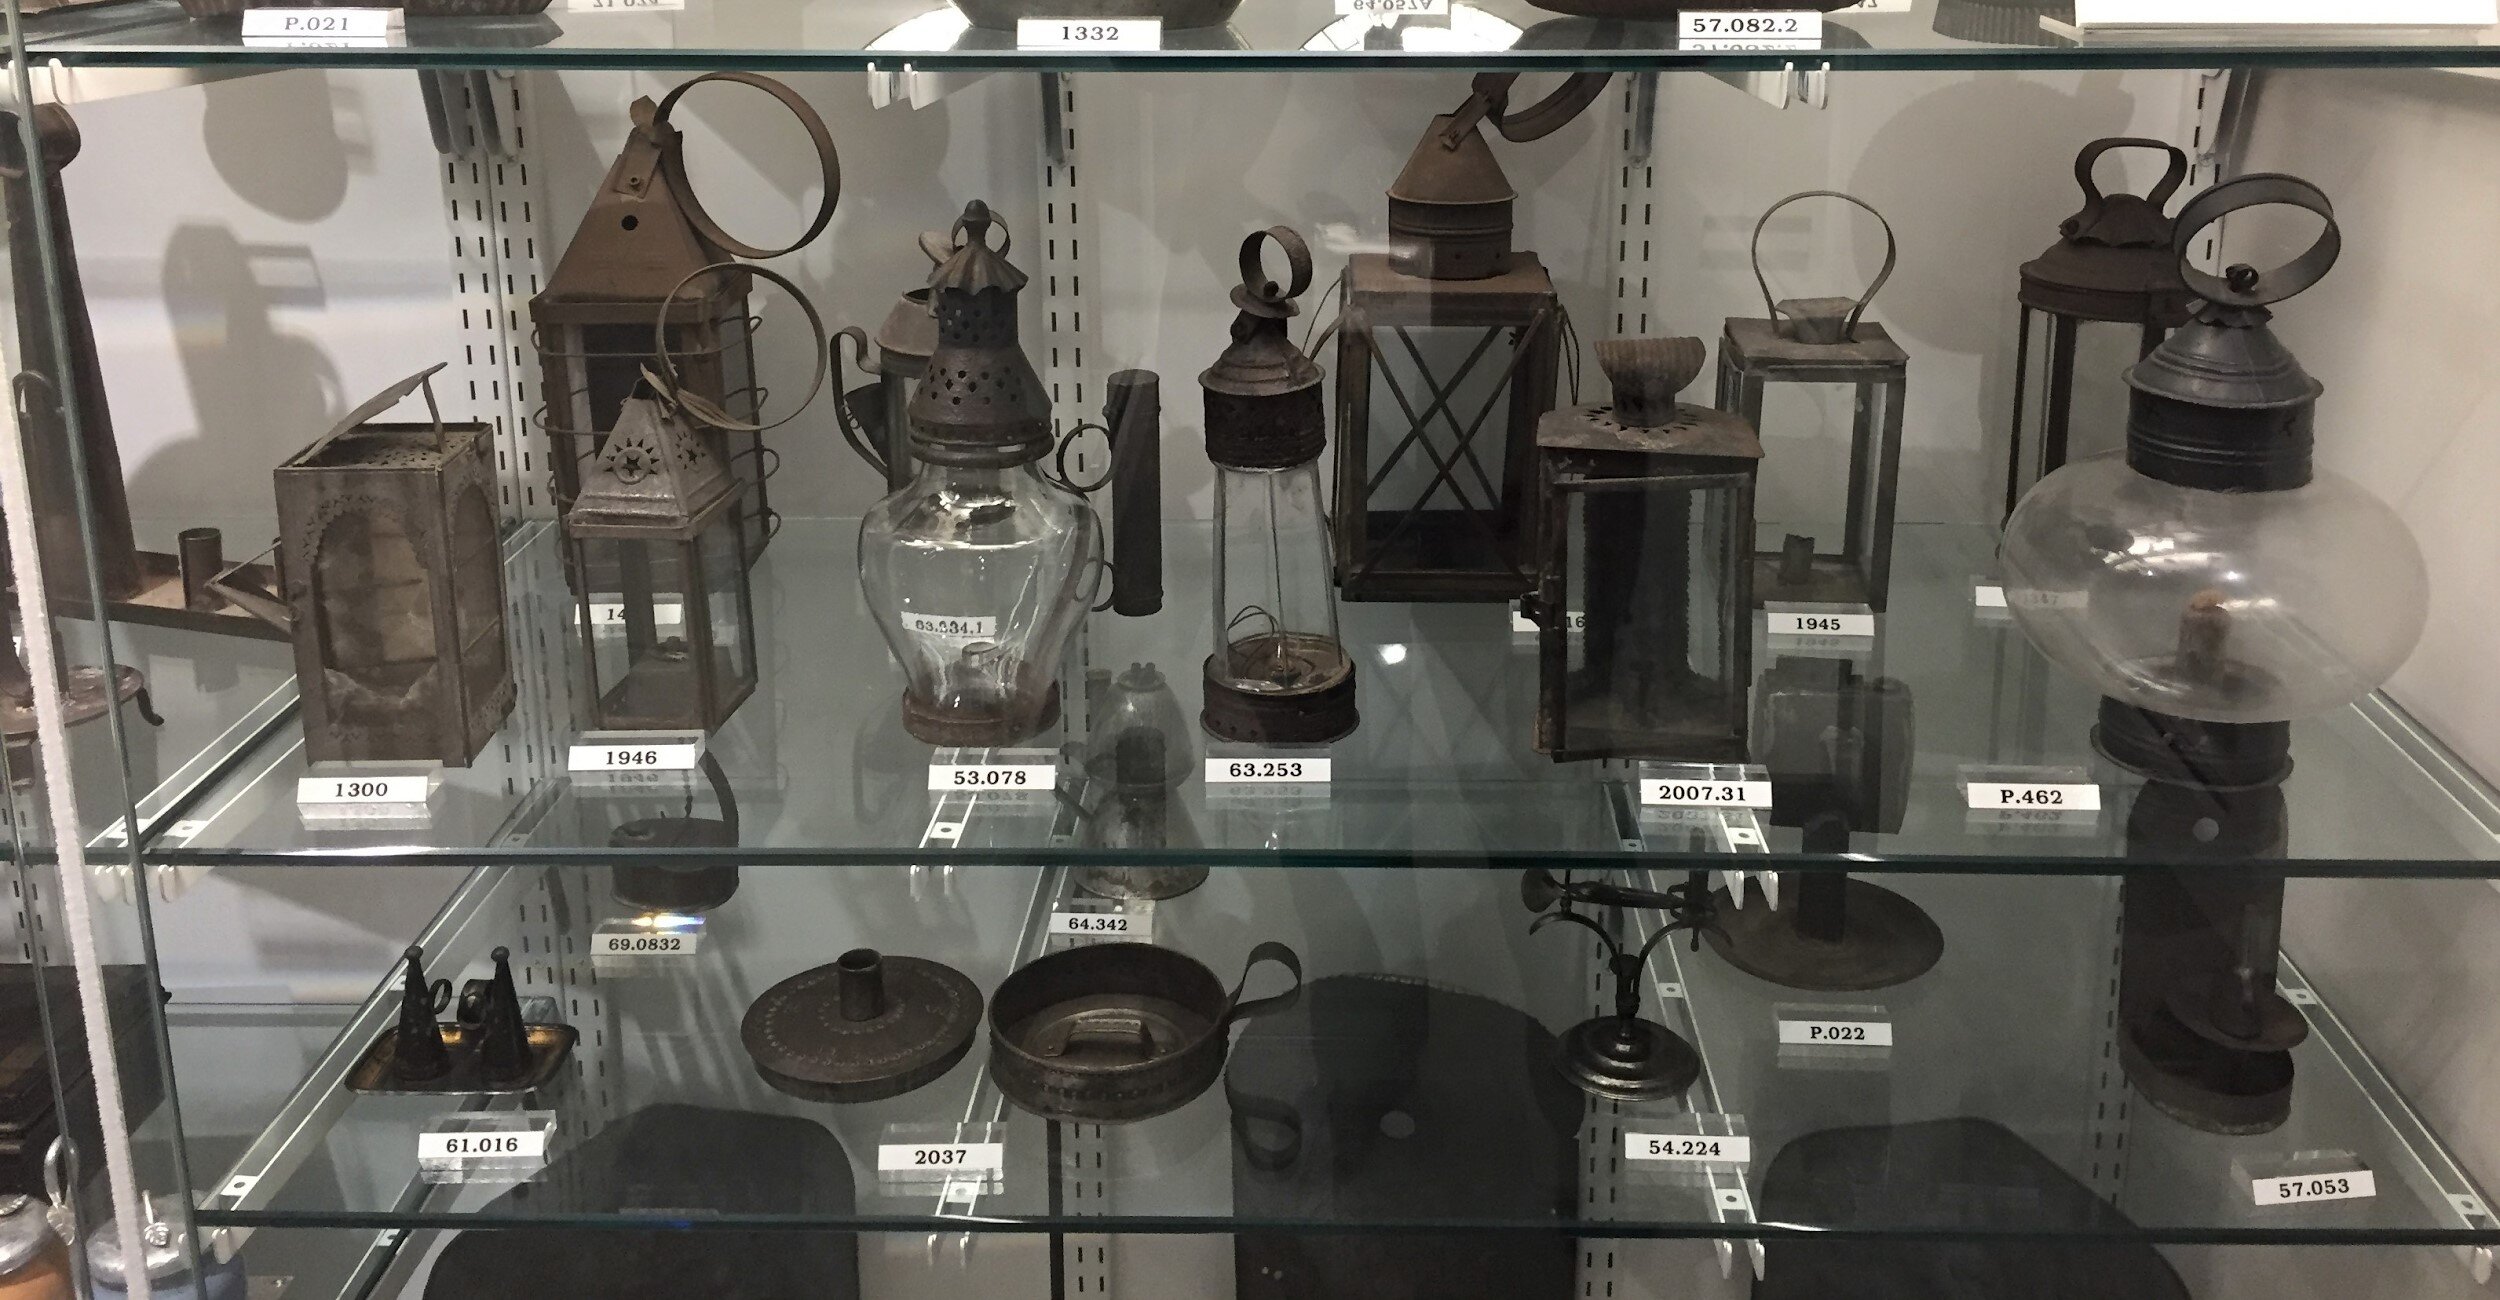
The Flynt Center of Early New England life has several shelves devoted to tin lanterns in the Museum’s Attic. You can see in the photo below that many have glass sides.
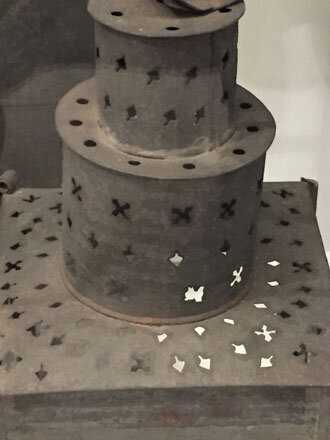
Our Maker Mondays project this month is to make a homemade lantern that is inspired by the punched tin lanterns in our collection. The photos below highlight the details of one of the lanterns that is in the Flynt Center.
Notice how the tinner used a variety of punch shapes to create the design at the top of this lantern. There are circles, x’s, and triangles. It takes many different tools to cut and shape the sheet of tinned iron into the various parts of the lantern and also different shaped punches to make the patterned designs.
Make your Own Homemade Lantern
The project for today is inspired by these lanterns from long ago. We have always wanted to do this project at the museum, but it is actually much easier to do at home, with materials and tools that you already have in your house.
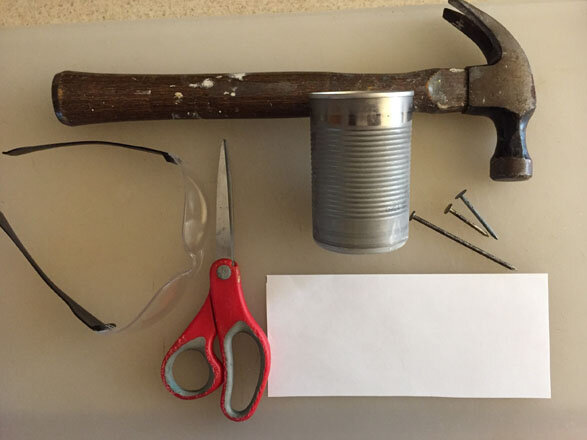
These are the supplies that you will need to make a punched tin lantern out of a soup can:
Clean empty soup can
Hammer
Nails
Safety glasses
Piece of paper
Scissors
Pencil or Pen
Towel
Step 1: Fill the clean empty soup can with water and place it upright in your freezer. As water freezes, it expands, so fill it half full with water; wait two or three hours, then add more water to within an inch of the rim. (If you fill the can all the way up to the top at first, the bottom of the can may bubble out and make your lantern wobbly). Freeze overnight.
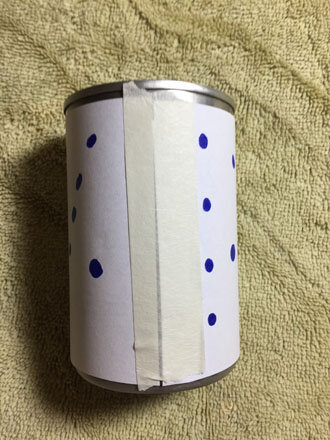
Step 2: Take the paper and cut a piece that measures the height and circumference of the soup can. Create a pattern on the paper that you will use to punch out your design.
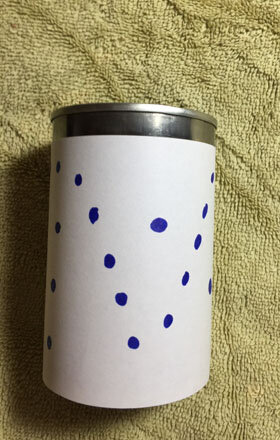
Step 3: Remove the can from the freezer and place on a folded bath towel. Tape the piece of paper with the design on it onto the can.
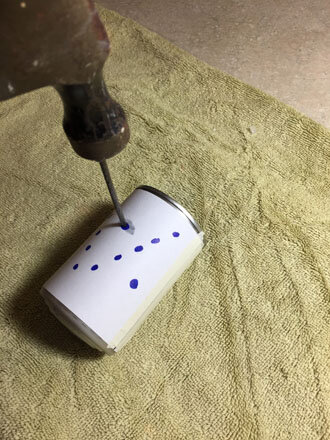
Step 4: Put on your safety glasses. Use a hammer and nail as your tin punching tools. Carefully hammer the nail into each mark on your pattern. It will take two-three blows to pierce the tin can. Adults should help children with this step. Everyone should be mindful of their fingers and hands. The towel provides stability for the frozen can and the ice in the can provides just enough resistance so that you don’t crush the can when you punch the holes with the nail.
Step 5: After you finish punching out the design, remove the pattern and rinse the can under warm water to remove any remaining ice. Let air dry or use a towel to dry the inside.
Step 6: Light your lantern! We suggest using a battery-powered tea light or votive candle. If you use a real tea light or candle, be careful as you light it.
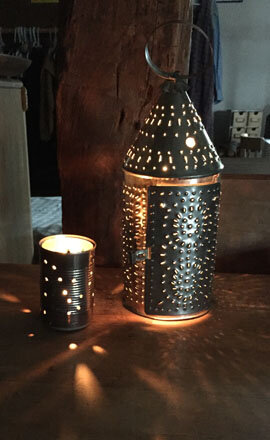
Our pierced tin soup can is on the left with a simple vertical and diagonal line pattern. The lantern to the right is a reproduction lantern with circular patterns. Note that our tin lantern has the holes punched from the outside in. A true punched tin lantern has the punched holes from the inside out. This feature allows for the lantern to be used outside in the wind which keeps the candle from blowing out.
We hope that you have enjoyed making a lantern to light up the dark November nights.
Please share a photo of your lantern and tell us how you made it. Email it to us at historicdeerfield@historicdeerfield.org.